Easy Crochet Bat: Free Beginner Amigurumi Pattern
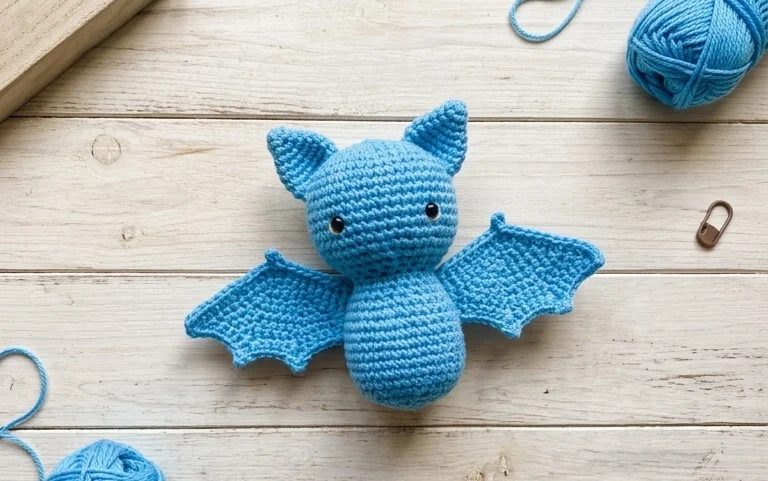
This small hanging friend features a soft, rounded body and pointed wings that feel dense in your palm. It works for anyone starting their amigurumi journey, serving as a quick project for those busy afternoons when you want something finished by bedtime. You will learn to manage the continuous spiral technique, which eliminates visible seams and creates a smooth surface for your creature. Once the main shape is done, you add personality with simple safety eyes and minimal embroidery. The tactile nature of working with worsted weight yarn makes this a soothing repetitive process for any hobbyist to enjoy.
Why You Will Love This Pattern
This beginner-friendly project works up quickly using basic single crochet stitches worked in a continuous spiral. Because it requires very little yarn, it is an excellent way to use up leftover bits from your stash while creating a functional item. The small scale makes it portable, meaning you can finish it during a short commute or while watching a show. You will find the repetitive nature of the rounds meditative and straightforward for building muscle memory.
I finished this project in a single evening using yarn I already had in my drawer, and the instructions were easy to follow for a beginner like me.
— Sarah, hobbyist crocheter
Pattern Overview & Skill Level
- Skill Level: Beginner
- Approximate Time: 1 to 2 hours
- Construction: Amigurumi-style continuous rounds using a magic ring for a seamless start and decrease rounds for shaping.
- Finished Dimensions: 3 inches tall by 2 inches wide.
Materials & Supplies Needed
- Yarn: Worsted weight (#4) acrylic or cotton yarn, approximately 20 yards.
- Hook Size: 4.0 mm (US G-6).
- Notions: Tapestry needle, stitch marker, fiberfill stuffing, and a pair of 6mm safety eyes.
- Yarn Substitutions: You can use DK weight yarn with a 3.5 mm hook for a smaller, more delicate finish, or bulky weight yarn with a 5.5 mm hook for a larger, chunkier result. Changing yarn weight will require adjusting the amount of fiberfill used for stuffing.
Stitch Guide & Abbreviations (US Terms)
- MR: Magic Ring
- ch: Chain
- sc: Single crochet
- inc: Increase (work 2 sc in the same stitch)
- dec: Decrease (work 2 sc together through the front loops only)
- sl st: Slip stitch
- st(s): Stitch(es)
Step-by-Step Pattern Instructions
Main Body
- Rnd 1: Work 6 sc into a magic ring (6 sts).
- Rnd 2: Work 2 sc in each st around (12 sts).
- Rnd 3: 1 sc, 1 inc repeat from * to * around (18 sts).
- Rnd 4: 2 sc, 1 inc repeat from * to * around (24 sts).
- Rnds 5-9: sc in each st around (24 sts).
- Rnd 10: 2 sc, 1 dec repeat from * to * around (18 sts).
- Rnd 11: 1 sc, 1 dec repeat from * to * around (12 sts).
At this stage, insert your safety eyes between Rnd 7 and Rnd 8 with 4 stitches of space between them. Begin stuffing the body firmly with fiberfill.
- Rnd 12: dec repeat 6 times (6 sts).
Finishing
Cut the yarn leaving a 6-inch tail. Use your tapestry needle to weave the tail through the front loops of the remaining 6 stitches. Pull tight to close the opening securely. Weave the remaining yarn end into the center of the piece to hide it.
Care & Washing Instructions
- Hand wash your finished item in cool water using a mild wool detergent.
- Do not wring or twist the item, as this can distort the shape and compress the stuffing.
- Lay the piece flat on a clean towel in a shaded area to air dry completely.
Pro Tips & Common Mistakes to Avoid
Maintain consistent tension throughout your rounds to prevent holes where the stuffing might show through. If your stitches feel too loose, try dropping down a hook size to achieve a tighter fabric density.
Always use a stitch marker at the beginning of every round. Because this project is worked in a continuous spiral, it is very easy to lose your place if you do not track the first stitch of each round.
To weave in ends invisibly, thread your yarn needle and pass it through the interior of the piece rather than the outer surface. This prevents the end from poking back out during regular use.
If you choose to adjust the size by adding more rounds, remember that each additional round increases the yarn requirement and the amount of fiberfill needed. Increasing the size significantly may require a larger hook to keep the fabric flexible.
Frequently Asked Questions
Can I use a different yarn weight for this project?
Yes, you can use any yarn weight provided you match it with a hook size that creates a tight, dense fabric suitable for holding fiberfill.
Is this pattern suitable for complete beginners?
Yes, this project focuses on the most fundamental crochet techniques and provides a straightforward introduction to shaping 3D objects.
Can I sell items made from this pattern?
You are welcome to sell finished items you create, but please ensure you credit the designer and do not use these specific instructions to create a commercial kit or mass-produced item.
How do I keep my edges smooth while working in a spiral?
Keeping your tension even and using a stitch marker to ensure you are completing every round correctly is the best way to maintain a smooth surface.
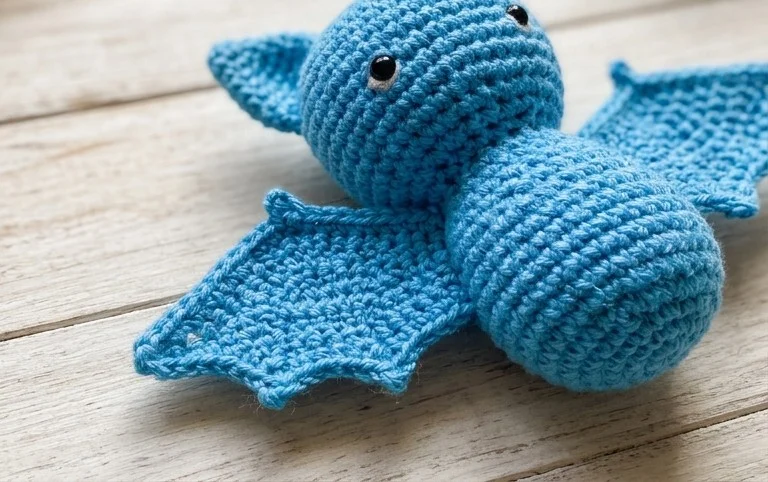
Your new handmade companion looks wonderful hanging from a desk lamp or sitting on a bookshelf during the autumn season. You can make it in soft grey or white yarn to change the look entirely, or use a fuzzy mohair blend if you prefer a fluffier texture. Sharing a photo of your creation helps other makers find their next project on social media platforms. Please visit the main archives for more free patterns to fill your collection with handmade items that build your skills.